
I love this technique. It is called Layered Masking. Start by stamping an open background stamp in black ink like the words I have here on this example. It is a retired CTMH stamp but D1477 Universal Backgrounds would work well for this technique. Then stamp a solid stamp image like this boy swinging from D1515 Play Time.

I used my CTMH Art Philosophy Cricut cartridge to cut an oval and circle shapes. I use the oval window and the solid circle as my layered masks. Just glue one to the other. Use any shapes that work well with the stamped image you want to use. Oh, and save the circle window for latter use. Here the circle will become the setting sun. I added Olive green with a sponge in a swiping motion where the grass would be.

Keeping the mask in place, I added Indian Corn Blue to the middle section and Gypsy to the top right hand corner in the same manner using a different sponge for each color in a swiping motion. These two colors give the sky a beautiful depth as the light is leaving the sky.

Remove the layered mask and you can see right where the sun will be.

Use the circle window that was cut earlier and place it right where the shape will be nested or even with a little of the blue showing so that there will be no white space between the two inked areas.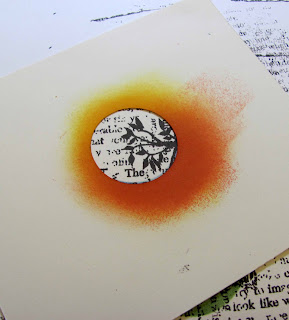

I added Sunflower ink over the entire window using a new sponge and swiping motion.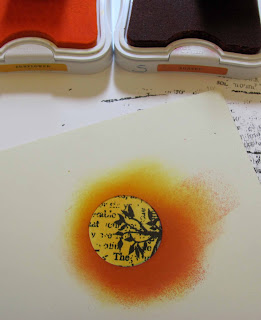

To create depth, I added a second darker color called Sunset. I swiped the Sunset in a crescent shape along the bottom and right side to create the shadowing effect.

Now remove your mask and voi la!

Layer your work as desired. Let me know if you give this technique a try. Post it on your blog.

This is stunning!! Thank you so much for posting the instructions! May I scraplift for my club, giving credit of course?
ReplyDeleteWow!!! This AWESOME!!!!
ReplyDelete